Essential Tips for Landscape Photography in Nepal: A Professional Guide
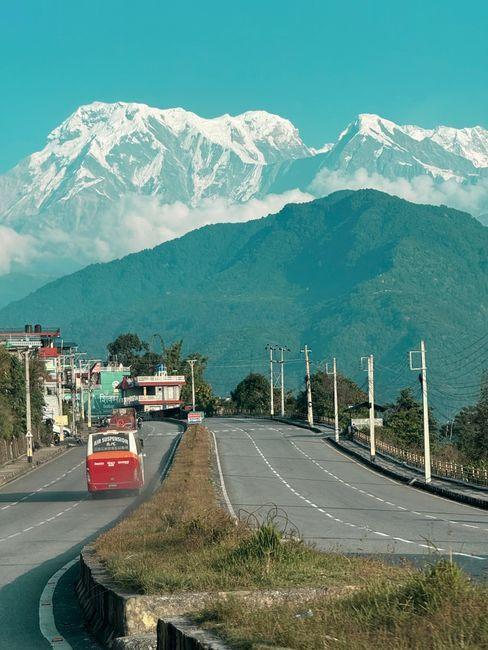
Nepal is not just a destination; it is a pilgrimage for landscape photographers. From the world's highest peaks to the mist-covered valleys of the middle hills, the visual scale here is humbling. Capturing the essence of the Himalayas requires more than just a high-end camera; it demands preparation, patience, and a deep respect for the terrain.
Why Nepal is a Photographer’s Paradise
Nepal offers a unique topographical transition, rising from the humid Terai plains to the sub-zero summits of the 8,000-meter giants. The light at high altitudes is crisp, and the interplay of shadows across jagged ridgelines provides endless opportunities for dramatic composition. Unlike other mountain regions, Nepal also offers a profound human element, where ancient monasteries and prayer flags add a spiritual dimension to your frames.
History and Cultural Significance
Photography in Nepal is inextricably linked to its cultural heritage. Landscapes here are often defined by human habitation—centuries-old stone houses, intricate stupas, and terraced fields carved into mountainsides. Understanding that these landscapes are considered sacred by local communities will guide you to be a more ethical and observant photographer.
Top Attractions for Landscape Photographers
- Gokyo Lakes: Offers arguably the best reflection photography in the Himalayas.
- Annapurna Base Camp (ABC): An amphitheater of 7,000m+ peaks surrounding you.
- Upper Mustang: A high-altitude desert landscape with stark, red-earth formations.
- Nagarkot: Perfect for low-effort, high-reward sunrise shots of the Langtang range.
Essential Photography Tips
Mastering the Light
The "golden hour" in the Himalayas is shorter than at sea level. Because of the steep terrain, peaks lose sunlight much earlier than the valleys. Plan your shots to capture the "alpenglow"—the pinkish light that hits the summits just before sunrise or after sunset.
Equipment Considerations
- Lenses: A wide-angle lens (16-35mm) is essential for vast panoramas, but a telephoto lens (70-200mm) is actually more useful for isolating peaks and capturing compression shots of mountain layers.
- Batteries: Cold weather kills batteries faster than you expect. Keep spares inside your down jacket, close to your body heat.
- Filters: A circular polarizer is non-negotiable to cut through atmospheric haze and deepen the blue of the sky.
Best Time to Visit and Weather
| Season | Visibility | Crowd Level | Photography Conditions |
|---|---|---|---|
| Autumn (Oct-Nov) | Excellent | High | Crisp, clear, ideal light |
| Spring (Mar-May) | Good | Moderate | Rhododendrons add color |
| Winter (Dec-Feb) | Best | Low | Harsh cold, but extreme clarity |
Practical Travel Advice
Transportation
Internal flights to Lukla or Jomsom are weather-dependent. Always build a 2-3 day buffer into your itinerary for potential flight cancellations. For road travel, 4WD vehicles are necessary for off-the-beaten-path locations in regions like Mustang.
Accommodation
Teahouses are the standard. They provide basic shelter and warmth. When choosing a room, prioritize those with windows facing east if you intend to shoot sunrise without leaving your sleeping bag.
Food and Fuel
Stick to the local staple: Dal Bhat. It provides the sustained energy needed for high-altitude photography treks. Carry high-calorie snacks like nuts and dried fruits to maintain focus during long shooting sessions.
Local Customs and Etiquette
Always ask for permission before photographing local people or interior religious ceremonies. In monasteries, photography is often prohibited inside the main prayer halls; look for signs or ask the resident lama.
Costs and Budgeting
Expect to spend between $40–$80 per day depending on the remoteness of your trek. This covers teahouse accommodation, meals, and permit fees. Professional filming permits may require higher fees and advance government clearance.
Safety and Packing
- Altitude Sickness: Never ignore symptoms. If you feel unwell, descend. No photo is worth your life.
- Weight Management: If you are trekking, every gram counts. Use a carbon fiber tripod to save weight while maintaining stability.
Sample 10-Day Photography Itinerary
- Days 1-2: Kathmandu (Street photography and architecture).
- Days 3-5: Pokhara and surrounds (Lakeside reflections and mountain vistas).
- Days 6-9: Annapurna Foothills (Focus on mountain textures and village life).
- Day 10: Return to Kathmandu.
Frequently Asked Questions
- Do I need a special permit for photography? For personal use, no. For commercial filming, you need a permit from the Department of Information.
- Is a drone allowed? Rules are strict. You need permission from the Civil Aviation Authority of Nepal (CAAN) and local authorities.
- How do I deal with mountain haze? Shoot early in the morning when the air is thinnest.
- What is the best way to keep gear dry? Use high-quality dry bags; mountain weather changes in minutes.
- Should I bring a tripod? Yes, for long exposures of stars and low-light landscapes.
- Are there power outlets? Yes, but charging costs money at higher altitudes. Carry a solar power bank.
Final Tips
Don't spend the entire trip behind the viewfinder. Sometimes, the most important part of the experience is putting the camera down and witnessing the scale of the Himalayas with your own eyes. The best photos often come when you are patient enough to let the light reveal itself to you.